Illuminating Your Path: The Definitive Guide to 2012 Jeep Grand Cherokee Overland Headlights
Illuminating Your Path: The Definitive Guide to 2012 Jeep Grand Cherokee Overland Headlights Lmctruck.Guidemechanic.com
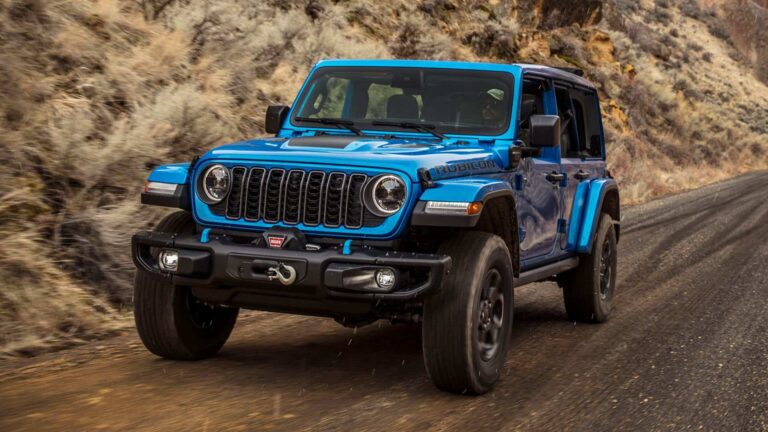
The open road, whether a well-paved highway or a challenging off-road trail, demands clear vision. For owners of the iconic 2012 Jeep Grand Cherokee Overland, your headlights are more than just functional components; they are critical safety features and a defining element of your vehicle’s rugged elegance. Understanding, maintaining, and potentially upgrading your 2012 Jeep Grand Cherokee Overland Headlights is paramount for both safety and preserving your vehicle’s premium appeal.
This comprehensive guide delves deep into everything you need to know about these essential components. From the original factory setup to troubleshooting common issues, exploring advanced upgrade options, and mastering vital maintenance, we’re here to light your way. Our goal is to provide real value, ensuring you have the knowledge to keep your Overland shining bright and safely navigate any journey.
Illuminating Your Path: The Definitive Guide to 2012 Jeep Grand Cherokee Overland Headlights
Understanding Your 2012 Jeep Grand Cherokee Overland Headlights: The OEM Setup
When your 2012 Jeep Grand Cherokee Overland rolled off the assembly line, it came equipped with a robust and well-designed lighting system. This factory configuration was chosen to balance performance, cost, and regulatory compliance, offering reliable illumination for most driving conditions. Knowing the specifics of this original equipment manufacturer (OEM) setup is the first step in any maintenance or upgrade journey.
What Came Standard? Dissecting the Factory Lights
The 2012 Jeep Grand Cherokee Overland typically featured projector-style halogen headlights for its low beams and reflector-style halogen bulbs for high beams. These were often complemented by separate fog lights, providing additional illumination in adverse weather. The projector housing for the low beams helped to focus the light, creating a more defined cutoff line and reducing glare for oncoming drivers.
The specific bulb types are crucial to note for future replacements. Generally, the 2012 Grand Cherokee uses an H11 bulb for the low beams and a 9005 bulb for the high beams. It’s always a good practice to double-check your owner’s manual or visually inspect the bulbs in your specific vehicle, as sometimes regional variations or production changes can occur. These bulbs are housed within durable, clear polycarbonate lenses designed to withstand various environmental conditions.
Beyond Illumination: The Importance of Your Headlights
While the primary function of headlights is, of course, to illuminate the road ahead, their importance extends far beyond simple visibility. Properly functioning headlights are a non-negotiable safety feature, allowing you to see obstacles, road hazards, and other vehicles, especially during nighttime driving or in inclement weather. They also ensure that other drivers can see your vehicle, significantly reducing the risk of accidents.
Furthermore, the condition of your 2012 Jeep Grand Cherokee Overland Headlights contributes significantly to your vehicle’s overall aesthetic. Clear, bright headlights enhance the luxurious and capable look of the Overland trim. Conversely, dim, yellowed, or damaged headlights can detract from its appearance and even signal neglect.
Common Issues and How to Diagnose Them
Even the most robust automotive components can experience issues over time. Headlights are no exception, constantly exposed to vibrations, temperature fluctuations, and environmental elements. Recognizing the symptoms of common headlight problems for your 2012 Jeep Grand Cherokee Overland Headlights is key to timely diagnosis and resolution, preventing minor issues from becoming major safety hazards.
Dim or Flickering Lights: A Sign of Trouble
One of the most noticeable issues is when your headlights appear dimmer than usual or begin to flicker intermittently. This can be more than just an annoyance; it’s a significant safety concern. Dimming can indicate an aging bulb that is nearing the end of its lifespan, as the filament degrades over time.
Flickering, on the other hand, often points to an inconsistent power supply. This could be due to loose wiring connections, a corroded ground wire, or a failing fuse. In some cases, a faulty headlight switch or even issues with the vehicle’s electrical system, such as a struggling alternator, could be the root cause. Based on my experience, checking the connections at the bulb first is always a good starting point before delving deeper into the wiring harness.
Yellowing and Hazing Headlight Lenses: The UV Attack
Perhaps the most common cosmetic and performance issue for older vehicles like the 2012 Jeep Grand Cherokee Overland is the yellowing or hazing of the headlight lenses. This cloudy appearance is primarily caused by prolonged exposure to ultraviolet (UV) radiation from the sun, which breaks down the polycarbonate material. Over time, road grime, chemicals, and general wear also contribute to this degradation.
The impact of yellowed lenses is more than just aesthetic. This opaque layer significantly reduces the amount of light that can pass through, effectively dimming your headlights even if the bulbs themselves are new and bright. This loss of light output severely compromises nighttime visibility, making driving more dangerous. It can also cause the light beam to scatter, creating glare for oncoming drivers.
Moisture or Condensation Inside the Housing: A Sealing Problem
Discovering moisture or condensation inside your headlight assembly is a clear indicator that the housing’s seal has been compromised. This can happen due to age, impact damage, or improper installation after a previous repair. Tiny cracks or gaps allow water vapor to enter the sealed unit, where it then condenses into visible droplets when temperatures change.
While a small amount of condensation that quickly dissipates might be normal in some conditions, persistent moisture or standing water inside the housing is problematic. It can corrode electrical components, damage the reflective surfaces, and drastically shorten the lifespan of your bulbs. Pro tips from us: If you notice persistent moisture, try to dry out the assembly thoroughly and then inspect the seals for any visible damage. Re-sealing with automotive-grade silicone sealant is often a viable DIY solution.
Bulb Burnout: The Inevitable End
Every light bulb has a finite lifespan, and eventually, it will burn out. Halogen bulbs, typical for the 2012 Grand Cherokee Overland, generally last between 500 and 1,000 hours of operation. Frequent on-off cycles, excessive vibration, and voltage spikes can all contribute to premature bulb failure.
When one bulb burns out, it’s often a good idea to consider replacing the opposing bulb as well. This is because bulbs from the same batch, installed at the same time, tend to fail around the same time. Replacing them in pairs ensures consistent light output and color, preventing one side from being noticeably dimmer or a different hue.
Headlight Alignment Issues: Aiming for Safety
Improper headlight alignment is a subtle yet dangerous issue. If your headlights are aimed too high, they will blind oncoming drivers, creating a hazardous situation for everyone on the road. If they are aimed too low or off to the side, your visibility will be severely reduced, leaving dark spots and decreasing your reaction time to obstacles.
Symptoms of misalignment include poor road illumination directly in front of your vehicle, a noticeably uneven light pattern, or frequent flashes from oncoming drivers indicating glare. Alignment can be affected by suspension changes, accidents, or even just general wear and tear over time. Correct alignment is crucial for maximizing visibility and ensuring road safety.
Upgrading Your 2012 Jeep Grand Cherokee Overland Headlights
While the OEM headlights are functional, technology has advanced considerably since 2012. Many Overland owners seek to enhance their vehicle’s lighting performance, aesthetics, and energy efficiency. Upgrading your 2012 Jeep Grand Cherokee Overland Headlights can dramatically improve nighttime driving and give your Jeep a more modern, aggressive look.
Why Consider an Upgrade? Beyond the Basics
The primary motivation for upgrading is usually improved visibility. Brighter, whiter light can reduce eye strain, increase reaction time, and make driving in challenging conditions much safer. Beyond safety, an upgrade can significantly enhance the vehicle’s appearance, moving away from the warmer, yellowish glow of halogens to a crisp, modern white or even blue-tinged light. Finally, many modern lighting technologies offer greater energy efficiency and longer lifespans, reducing the frequency of bulb replacements.
Halogen to LED Conversion: A Popular Choice
Converting your existing halogen setup to LED (Light Emitting Diode) is one of the most popular upgrade paths. LEDs offer several compelling advantages: they are significantly brighter than halogens, produce a whiter light (often 5000K-6000K color temperature), have a much longer lifespan (tens of thousands of hours), and consume less power. This combination makes them highly attractive for performance and efficiency.
However, an LED conversion isn’t always a simple plug-and-play process. While many kits are designed to fit into existing halogen sockets, considerations like beam pattern and heat management are critical. Cheap LED bulbs can create excessive glare for oncoming drivers if their light source doesn’t accurately mimic the halogen filament’s position within the reflector or projector housing. Additionally, the 2012 Grand Cherokee’s CANbus system might detect the lower power draw of LEDs as a "bulb out" error, leading to flickering or dash warning lights. You’ll often need specific LED kits that include CANbus decoders or anti-flicker modules to resolve these issues.
Halogen to HID/Xenon Conversion: Intense Illumination
High-Intensity Discharge (HID), often referred to as Xenon, is another upgrade option that provides a very bright and intense light output, typically brighter than even many LED kits. HIDs use an electric arc between two electrodes to ignite xenon gas, producing a powerful, blue-white light. They are particularly effective in projector housings, like those found on the 2012 Overland’s low beams, as the projector helps to control the intense light and maintain a sharp cutoff.
HID conversions are generally more complex to install than LEDs because they require separate ballasts to ignite and regulate the xenon gas. These ballasts need to be mounted securely and protected from moisture. While HIDs offer superb brightness, they also have a warm-up period before reaching full intensity, and their lifespan, while longer than halogens, is typically shorter than LEDs. Common mistakes to avoid are installing HID bulbs into reflector housings not designed for them; this creates extreme glare for other drivers and is often illegal. Always ensure your HID kit is designed for projector headlights if you’re replacing your low beams.
Full Headlight Assembly Replacement (Aftermarket): A Complete Transformation
For those seeking a complete overhaul or whose existing headlight assemblies are severely damaged, an aftermarket full headlight assembly replacement is an option. These assemblies can range from OEM-style replacements to highly customized units featuring integrated LED daytime running lights (DRLs), sequential turn signals, or advanced projector retrofits. This is an excellent way to achieve a truly modern look and often comes with improved optics and durability.
The benefits include a fresh, new appearance and often superior light output with modern features built-in. However, the cost is significantly higher than just replacing bulbs, and the quality of aftermarket assemblies can vary widely. It’s crucial to research reputable brands and read reviews to ensure good fitment, durability, and lighting performance. Based on my experience, investing in higher-quality aftermarket assemblies often pays off in the long run with fewer issues and better light output.
Restoring Yellowed/Hazed Lenses: The Cost-Effective Solution
Before considering a full replacement or expensive bulb upgrades, addressing yellowed or hazy lenses is often the most cost-effective way to improve your 2012 Jeep Grand Cherokee Overland Headlights. There are numerous DIY headlight restoration kits available that involve sanding, polishing, and sealing the lenses. These kits can dramatically improve light output and restore the clarity of your headlights for a fraction of the cost of new assemblies.
The process typically involves cleaning the lens, then progressively sanding it with finer grits of sandpaper to remove the oxidized layer, followed by polishing to restore clarity. The final and most crucial step is applying a UV protective sealant, which helps prevent future yellowing. Without this sealant, the lenses will quickly degrade again. For severely damaged lenses, professional restoration services can often achieve even better results.
Maintenance Tips for Longevity and Optimal Performance
Regular maintenance is the cornerstone of keeping your 2012 Jeep Grand Cherokee Overland Headlights performing at their best. Neglecting these vital components can lead to reduced visibility, premature failure, and unnecessary expenses. A little proactive care goes a long way in ensuring your safety and extending the life of your lighting system.
Regular Cleaning: Simple Yet Effective
It might seem obvious, but regularly cleaning your headlight lenses is incredibly important. Road grime, insects, bird droppings, and environmental pollutants can accumulate on the lens surface, creating a film that diffuses light and reduces output. Use a soft cloth and a mild automotive glass cleaner to wipe down the lenses whenever you wash your vehicle. Avoid harsh abrasives or chemicals that could damage the polycarbonate.
Inspecting for Damage: Early Detection is Key
Make it a habit to periodically inspect your headlight assemblies for any signs of damage. Look for cracks in the lens or housing, loose seals, or any indications of moisture intrusion. Even small cracks can compromise the integrity of the unit, allowing water and dirt to enter. Early detection of these issues can prevent more significant problems down the line, such as corroded wiring or damaged reflectors.
Bulb Replacement Best Practices: Handle with Care
When it comes time to replace a bulb, always follow a few best practices. Firstly, ensure your vehicle is off and cooled down, and disconnect the battery as a safety precaution. When handling halogen bulbs, avoid touching the glass portion with your bare hands. The oils from your skin can create hot spots on the bulb’s surface, leading to premature failure once the bulb heats up. Use gloves or a clean cloth to handle the bulb.
As mentioned earlier, pro tips from us: always consider replacing bulbs in pairs. Even if only one has burned out, the other is likely to fail soon, and replacing both ensures consistent light output and color temperature across the front of your vehicle. Refer to your owner’s manual for specific instructions on accessing and replacing bulbs, as the process can vary slightly depending on the side and bulb type.
Professional Inspection: When to Call the Experts
While many basic maintenance tasks can be handled at home, there are times when a professional inspection is warranted. If you’re experiencing persistent electrical issues, such as flickering lights that aren’t resolved by bulb replacement or wiring checks, it’s best to consult a certified mechanic. Similarly, if you suspect internal damage to the headlight assembly, or if you’re unsure about proper headlight alignment after an accident or suspension modification, professional help ensures the job is done correctly and safely.
Legal and Safety Considerations
Modifying or replacing your 2012 Jeep Grand Cherokee Overland Headlights isn’t just about performance and aesthetics; it also involves crucial legal and safety considerations. Understanding these regulations is vital to ensure your vehicle remains road legal and, more importantly, safe for yourself and other drivers.
Headlight Brightness and Color Laws: Stay Compliant
Headlight regulations vary significantly by state, country, and even local municipalities. These laws typically govern the maximum allowable brightness (measured in lumens), the acceptable color temperature (usually white to amber), and the beam pattern. While a whiter light from LEDs or HIDs is generally acceptable, extremely blue or purple lights may be illegal in some areas. Excessive brightness can also lead to fines or even vehicle impoundment in some jurisdictions. Always research your local laws before making significant modifications.
Glare Prevention: A Shared Responsibility
Perhaps the most critical safety consideration is preventing glare for oncoming drivers. Poorly designed or improperly installed aftermarket bulbs, especially HIDs or LEDs in housings not designed for them, can scatter light in an uncontrolled manner. This "light scatter" causes significant glare, temporarily blinding other drivers and dramatically increasing the risk of an accident.
Proper aiming of your headlights is also crucial. Even perfectly legal bulbs, if aimed too high, will cause severe glare. After any headlight work, it’s highly recommended to verify your headlight aim, either professionally or using a DIY method against a wall, to ensure the beam pattern is correct and safe.
Ensuring Proper Function: A Pre-Drive Check
Before every drive, especially at night, make it a quick habit to ensure all your lights are working correctly. This includes low beams, high beams, turn signals, and fog lights. A quick visual check can identify a burned-out bulb before you even leave your driveway, preventing a potentially dangerous situation or a traffic citation. This simple routine is a small effort for a significant safety gain.
Step-by-Step: Replacing a Headlight Bulb (General Guide)
Replacing a headlight bulb on your 2012 Jeep Grand Cherokee Overland is a common maintenance task that many owners can perform themselves. While specific steps can vary, this general guide provides an overview. Disclaimer: Always consult your vehicle’s owner’s manual for the most accurate and detailed instructions for your specific model year and trim.
- Gather Your Tools: You’ll typically need a Phillips head screwdriver, possibly a flathead screwdriver, and the correct replacement bulb (H11 for low beam, 9005 for high beam). Consider having a pair of clean gloves to avoid touching the new bulb’s glass.
- Safety First: Park your Jeep on a level surface, turn off the engine, and engage the parking brake. For added safety, disconnect the negative terminal of your battery to prevent any accidental electrical shorts. Allow the existing bulb to cool down if it has been recently on.
- Access the Headlight Assembly: For the 2012 Grand Cherokee, accessing the headlight bulbs usually involves opening the hood. You’ll need to locate the back of the headlight assembly. Sometimes, removing a plastic cover or air intake duct might be necessary to gain enough space.
- Disconnect the Electrical Connector: Carefully grasp the electrical connector attached to the back of the bulb. It usually has a tab or clip that needs to be pressed or squeezed to release it. Gently pull the connector straight off the bulb.
- Remove the Old Bulb: Once the connector is off, there might be a rubber dust cap that needs to be twisted or pulled off. The bulb itself is typically held in place by a retaining clip or a twist-lock mechanism. For twist-lock bulbs, gently rotate the bulb counter-clockwise (about a quarter turn) until it releases from the housing. For clip-style bulbs, release the spring clip. Carefully pull the old bulb straight out.
- Install the New Bulb: With your clean gloves, insert the new bulb into the housing, ensuring the tabs on the bulb base align with the slots in the housing. Push it in firmly and then twist it clockwise (for twist-lock) or re-engage the retaining clip until it is securely seated. Make sure it’s snug and doesn’t wobble.
- Reattach Components: Reinstall the rubber dust cap, ensuring it forms a tight seal. Reconnect the electrical connector until you hear or feel a click, indicating it’s secure.
- Test and Reassemble: Reconnect your battery, turn on your headlights, and verify that the new bulb is working. Check both low and high beams. If everything looks good, reassemble any other components you removed to gain access.
- Check Alignment (Optional but Recommended): After replacing a bulb, especially if you’ve handled the assembly, it’s a good idea to perform a quick headlight alignment check to ensure the beam pattern is still correct.
Frequently Asked Questions (FAQs)
Here are some common questions we encounter regarding 2012 Jeep Grand Cherokee Overland Headlights:
Q: What specific bulb types does my 2012 Jeep Grand Cherokee Overland use?
A: Typically, your 2012 Grand Cherokee Overland uses H11 bulbs for the low beams and 9005 bulbs for the high beams. We always recommend checking your owner’s manual or physically inspecting the bulbs in your vehicle for absolute confirmation.
Q: Are LED headlight conversions legal for my 2012 Grand Cherokee?
A: The legality of LED conversions varies by region. In many places, it’s a gray area. While the bulbs themselves aren’t inherently illegal, issues arise if they cause excessive glare due to improper beam patterns in halogen housings, or if their color temperature is outside legal limits. Always prioritize safety and ensure your converted headlights are properly aimed to prevent blinding other drivers.
Q: How often should I replace my headlights?
A: Halogen bulbs typically last between 500-1,000 hours of operation. There isn’t a fixed replacement schedule; you should replace them when they burn out or when you notice them becoming significantly dimmer. For optimal safety, consider replacing both left and right bulbs at the same time to ensure consistent light output.
Q: Can I clean the inside of my headlight assembly if there’s dust or moisture?
A: Cleaning the inside of a sealed headlight assembly is generally not recommended for DIYers. Opening the housing can compromise the seal, leading to more persistent moisture issues. If you have significant dust or moisture inside, it often indicates a compromised seal, and the best solution is usually to dry it out and re-seal the housing, or consider a full assembly replacement if the damage is severe.
Q: My headlights are yellowed. Can I restore them myself?
A: Absolutely! Many effective DIY headlight restoration kits are available. These kits typically involve sanding, polishing, and applying a UV protectant. For severely oxidized lenses, professional restoration services can often achieve excellent results. Restoration is a cost-effective way to improve clarity and light output.
Conclusion: Light Up Your Overland’s Journey
Your 2012 Jeep Grand Cherokee Overland Headlights are more than just an accessory; they are a fundamental aspect of your vehicle’s safety, performance, and aesthetic appeal. From understanding the factory setup to diagnosing common issues, exploring modern upgrade paths, and committing to regular maintenance, a knowledgeable approach ensures your Overland continues to provide exceptional visibility on every journey.
By taking the time to care for these crucial components, you’re not just maintaining your Jeep; you’re investing in your safety and the safety of everyone on the road. Whether you choose to keep your OEM lights meticulously maintained or opt for a cutting-edge upgrade, ensure your vision remains crystal clear. Drive confidently, knowing your path is well-illuminated, and your iconic Jeep Grand Cherokee Overland shines brightly, day and night.